
Quickstarts
Get running with your first experiment in 5 steps
This guide walks you through the steps to get your first Convert Fullstack experiment running, regardless of which SDK you use. For language-specific installation and code examples, see the per-SDK quickstarts linked at the bottom.
Prerequisites
Before you begin, make sure you have:
- A Convert account with access to Fullstack projects (app.convert.com)
- A Fullstack project created in the Convert UI (see Step 1 below)
- Your project's SDK Key (see Step 2 below)
- A server-side or client-side environment where you can install and run the SDK
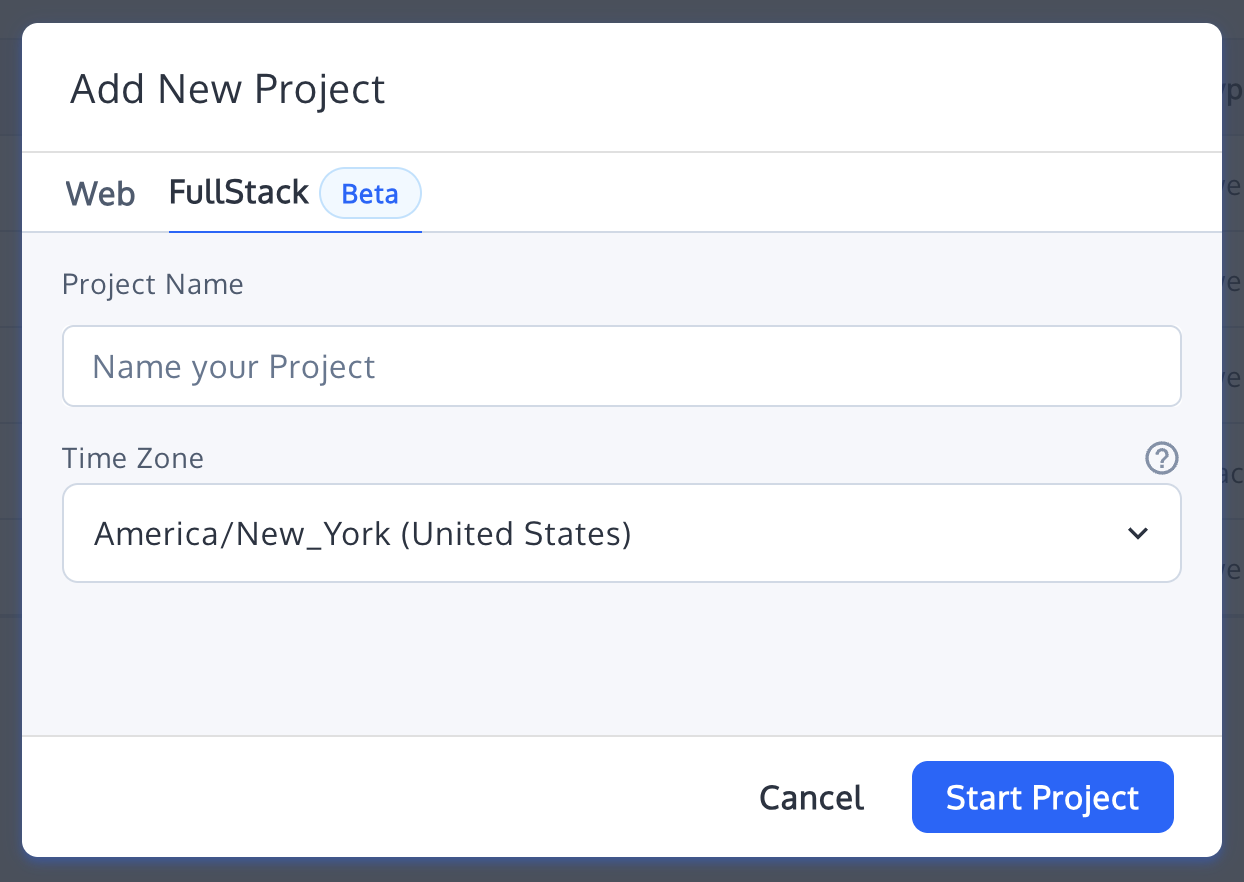
Step 1: Create a Fullstack Project
In the Convert UI, create a new project and select the Fullstack project type. This project type supports a/b_fullstack and feature_rollout experiences with fullStackFeature variation changes.
Within your project, set up at least one experience (A/B test or feature rollout) with:
- A unique key for the experience
- At least one non-original variation with a unique key
- One or more goals to track conversions against
- An audience of type
transient(the default for Fullstack projects)
All entities in a Fullstack project (experiences, variations, goals, audiences, rules) must have a unique key string.
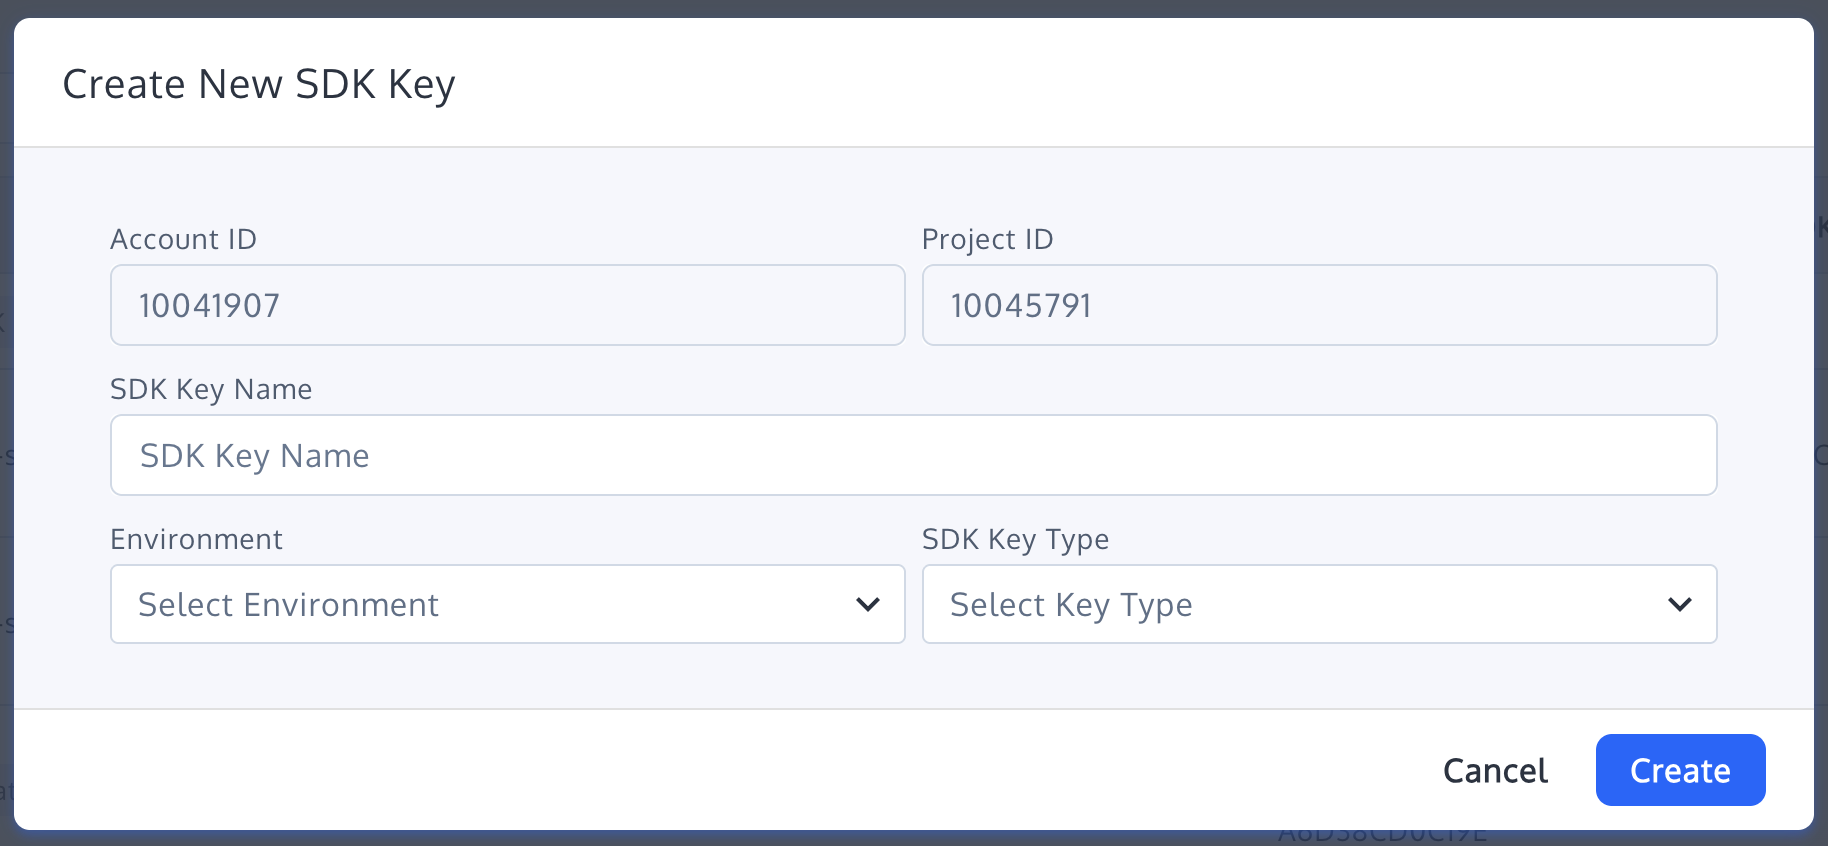
Step 2: Get Your SDK Key
Navigate to Project Settings in your Fullstack project. Copy the SDK Key — this is the credential the SDK uses to fetch your project configuration from Convert's CDN.
If your project uses an authenticated SDK Key, you will also need the SDK Key Secret.
Step 3: Install the SDK
Install the Convert Fullstack SDK for your platform. See the per-SDK quickstarts for installation commands and environment requirements:
| SDK | Installation | Quickstart |
|---|---|---|
| JavaScript / TypeScript | npm install @convertcom/js-sdk | JavaScript Quickstart |
| PHP 8.2+ | composer require convertcom/convertcom-php-sdk | PHP Quickstart |
| Kotlin / Java (minSdk 24) | implementation("com.convert:sdk-android:+") | Android Quickstart |
| Ruby 3.1+ | gem install convert_sdk | Ruby Quickstart |
| Swift 6 (iOS 15+) | .package(url: "https://github.com/convertcom/ios-sdk.git", from: "1.0.0") | iOS Quickstart |
| Python 3.9+ | pip install convert-python-sdk | Python Quickstart |
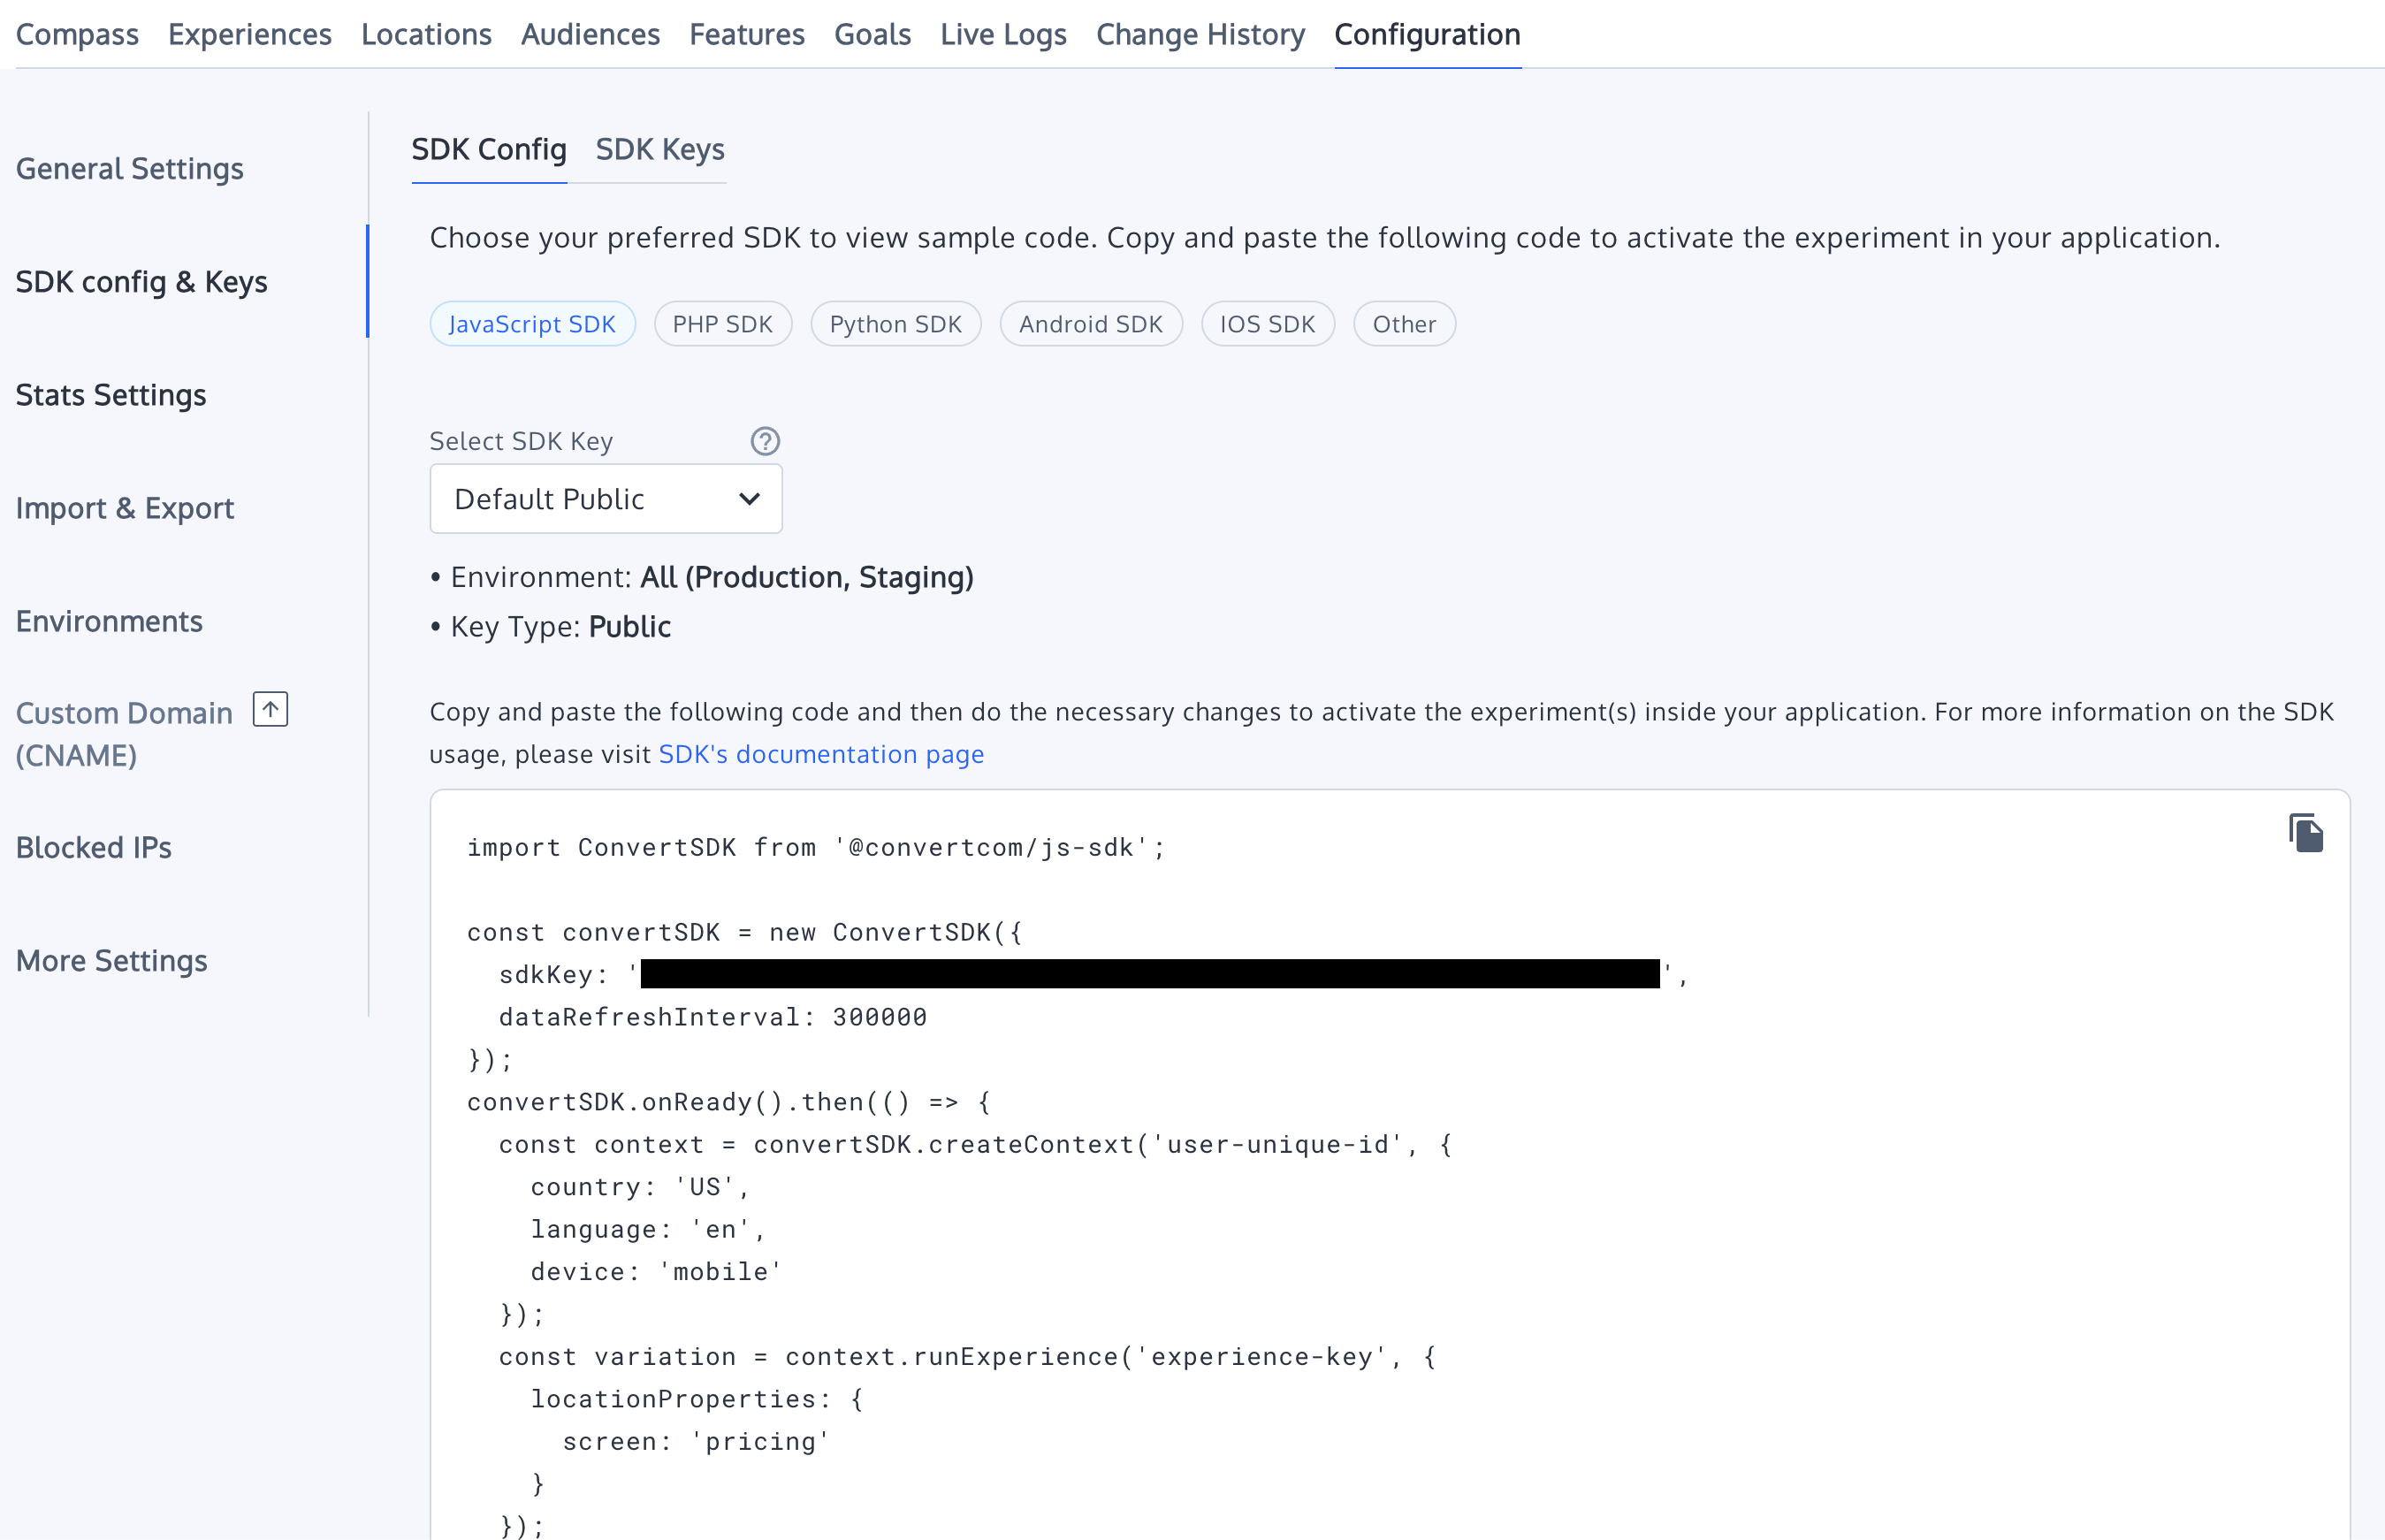
Step 4: Initialize, Create Context, and Run an Experiment
Every Convert Fullstack SDK follows the same three-step pattern:
- Initialize the SDK with your SDK Key (or a static project configuration). The SDK fetches your project config from Convert's CDN and caches it locally.
- Create a visitor context by providing a unique visitor/user ID. This ID is used for deterministic bucketing — the same ID always maps to the same variation for a given experience.
- Run an experience by its key. The SDK evaluates targeting rules (audiences, locations) and returns the assigned variation. Use the variation key or its feature variables to control what the visitor sees.
The per-SDK quickstarts contain the actual code for each language. The core flow is identical across all SDKs — only the syntax differs.
Step 5: Track a Conversion
Once the visitor completes a meaningful action (sign-up, purchase, page view), track it as a goal conversion. Call the SDK's tracking method with the goal key.
Conversion events are batched and sent to Convert's servers, where they appear in your experience reports. Revenue values and custom properties can be attached depending on the goal type.
What Happens Under the Hood
For a deeper explanation of the SDK lifecycle (initialization, bucketing, feature resolution, event tracking), see How Convert Works.
Per-SDK Quickstarts
- JavaScript SDK Quickstart — Node.js, browser, and bundler setup
- PHP SDK Quickstart — Composer installation with PSR-18 HTTP client
- Android SDK Quickstart — Gradle installation, builder init, first experiment
- Ruby SDK Quickstart — Bundler installation,
ConvertSdk.create, first experiment - iOS SDK Quickstart — Swift Package Manager installation,
ConvertSwiftSDK(configuration:), first experiment - Python SDK Quickstart — pip / uv / Poetry installation,
Core(SDKConfig(...)).initialize(), first experiment
Next Steps
- Fullstack Constraints — Rules, audiences, and entity requirements for Fullstack projects
- Running Experiences — Detailed guide to running A/B tests
- Running Features — Feature flags and variable resolution
- Tracking Conversions — Goal tracking, revenue, and event batching
- Architecture Overview — Internal SDK structure
- Data Model Reference — Entity relationships and field definitions